Weld Symbols
Contained on this page are examples of weld symbols on different types of fabrication drawings. These drawings range from panels, pipes, custom parts & site instructions. Weld symbols are a necessary part of creating fabrication drawings, as it explains the size & type of weld we require our fabricators to create.
Understanding a Weld Symbol
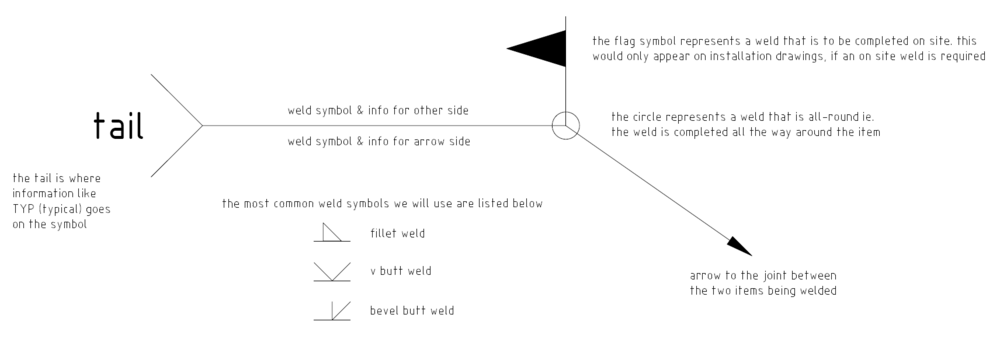
The weld symbol is an easy representation of the type of weld, its size, and other processing and finishing information. Below is an example weld symbol, showing the structure of the symbol & what each part represents.
Panels
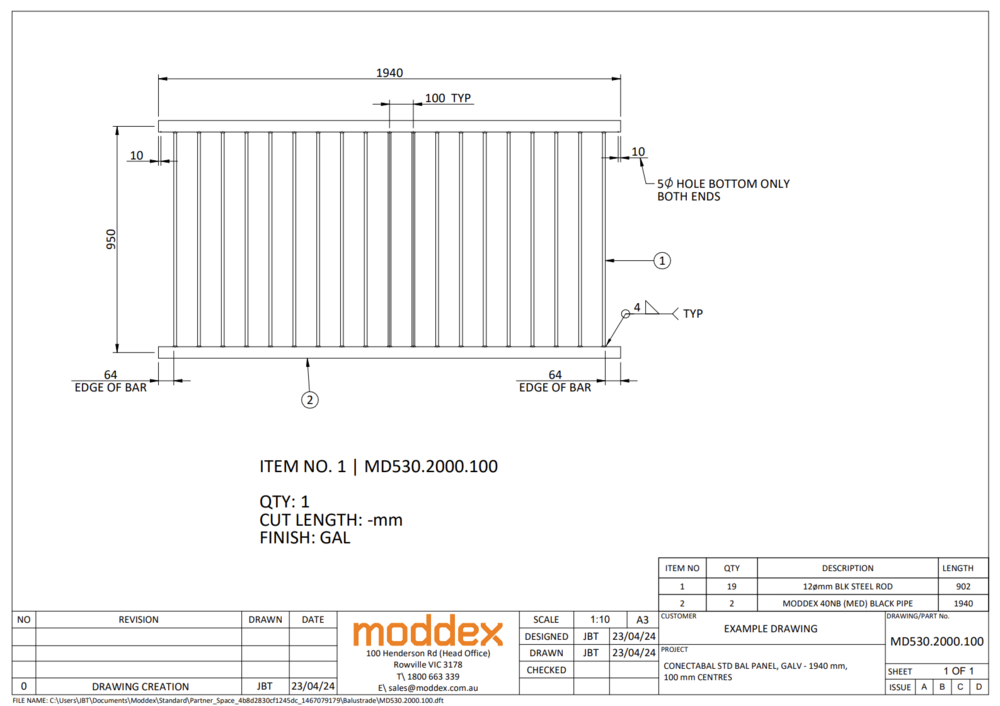
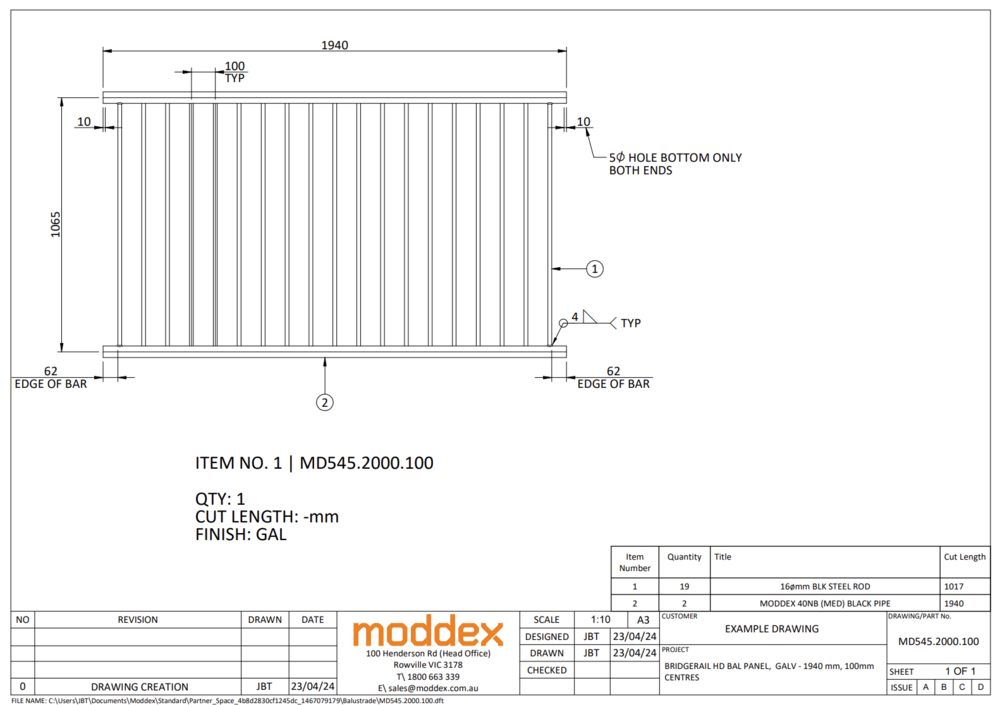
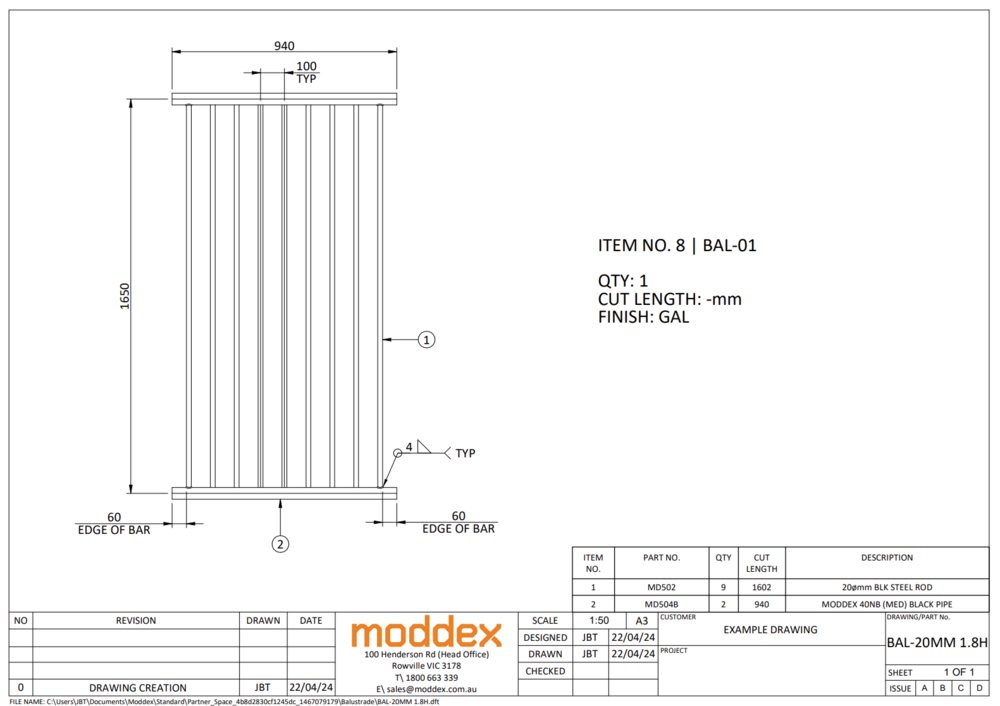
On balustrade panels, regardless of rod size (12, 16, 20mm), we will always use a typical 4mm fillet weld all-round. Below are example drawings of 12mm, 16mm & 20mm rod panels.
Pipe to Plate
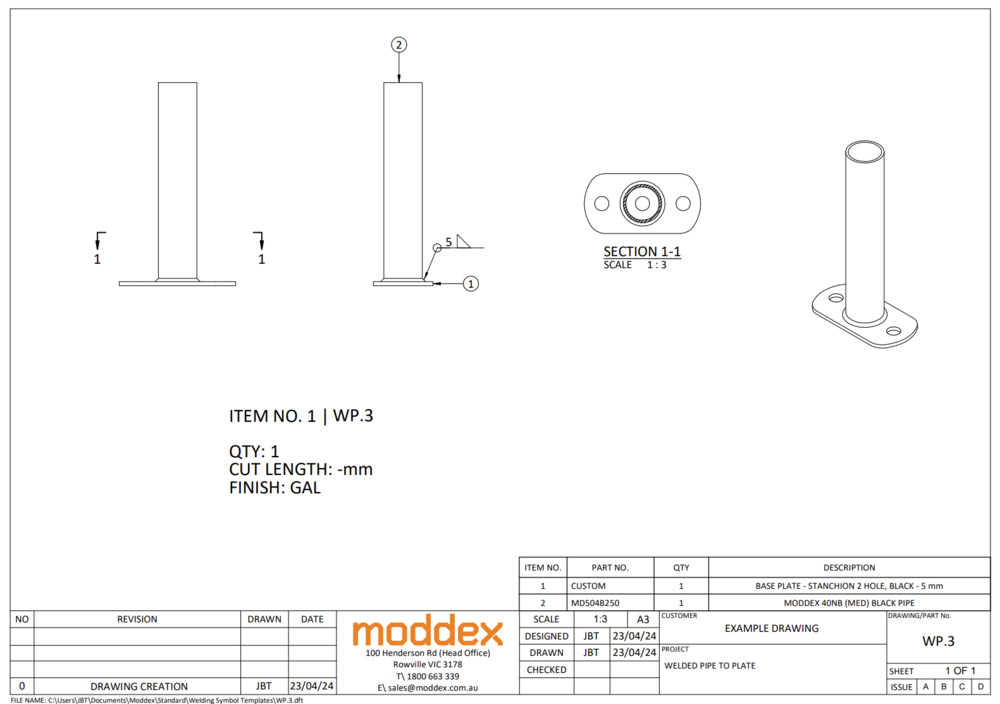
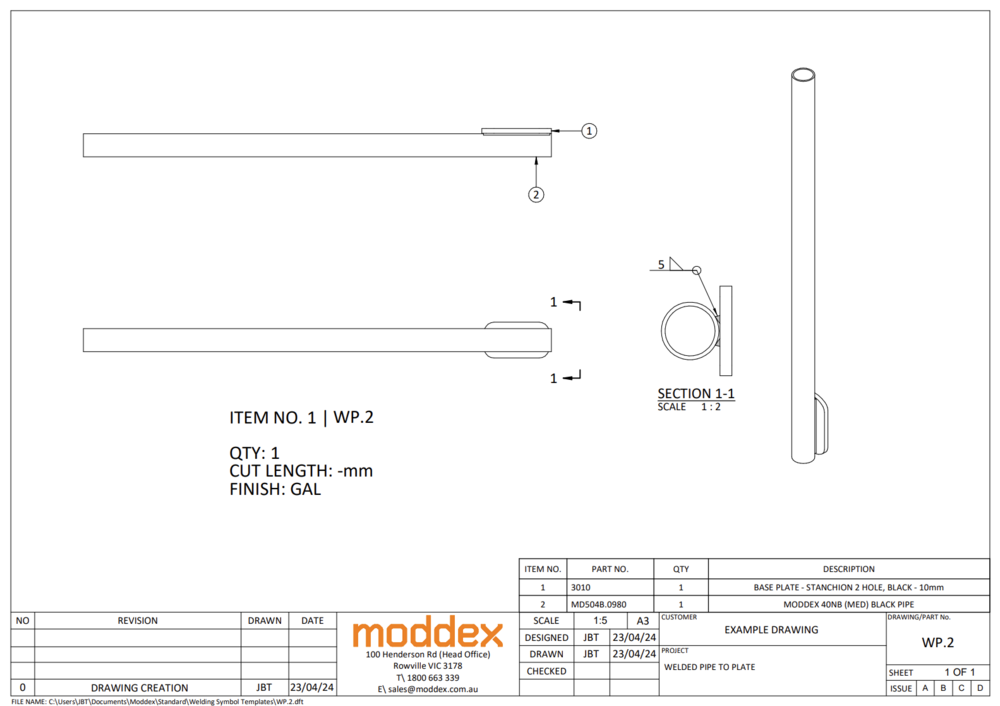
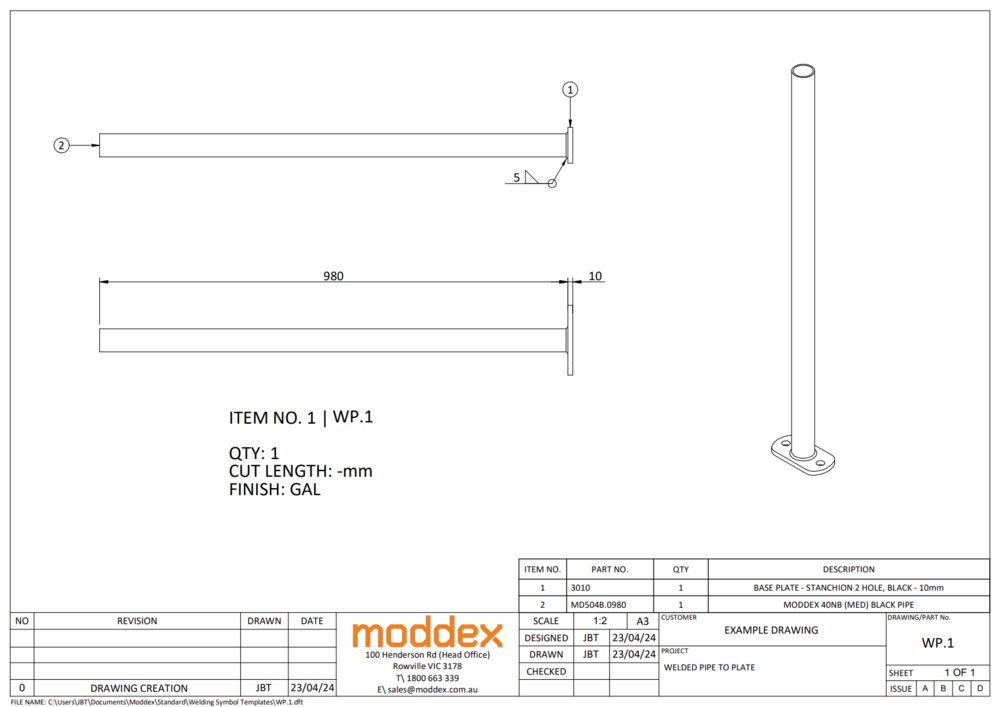
When welding plates to pipe, a 5mm fillet weld all-round is used. Below are example drawings of different orientation & sizes of plates welded to pipe.
100x6 Kickplate
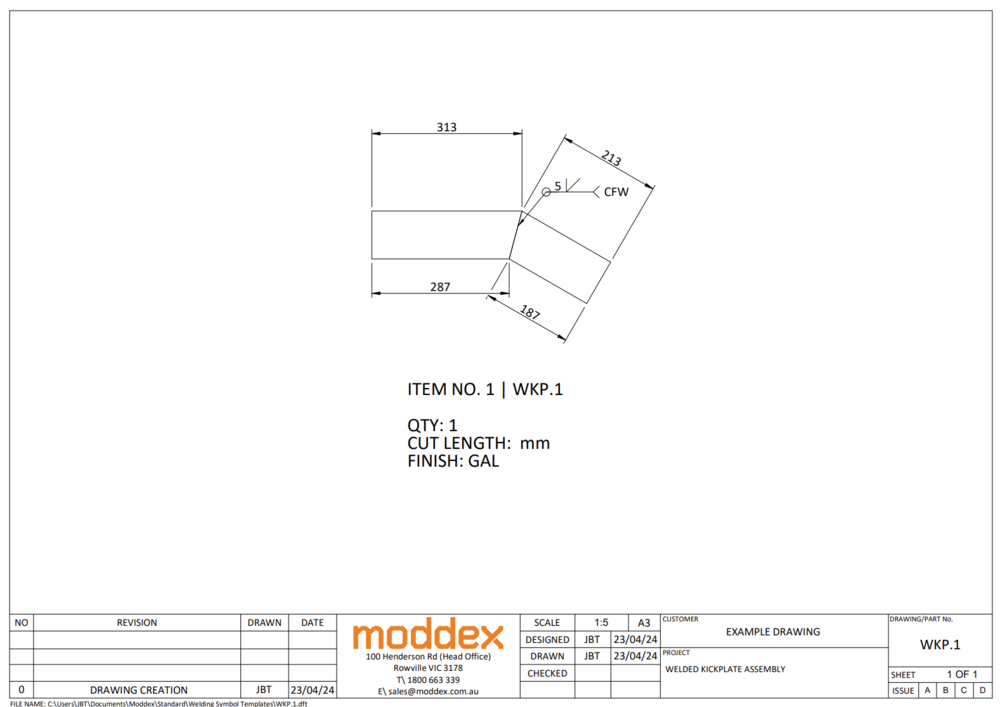
100x6 kickplate requires a 5mm bevel butt, continuos fillet weld all-round. Below is an example drawing showing this.
Rail to Rail
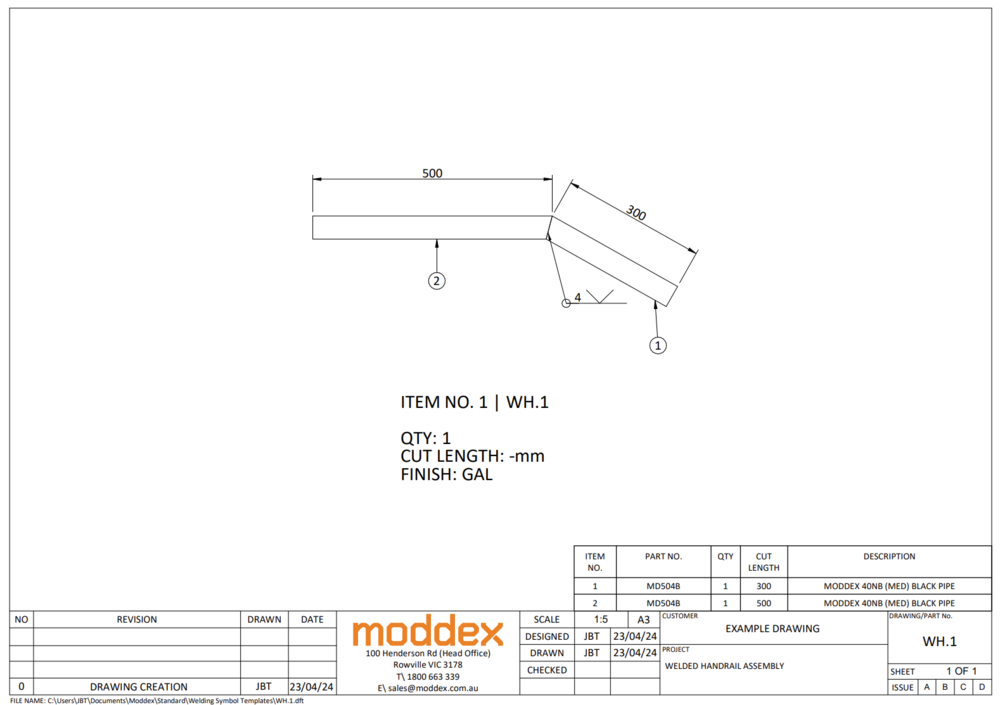
When welding pipes directly to other pipes, a 4mm V butt weld all-round is required. This symbol is used on such items as welding mitred pipes or welding 3300 to pipes for balustrade panels.
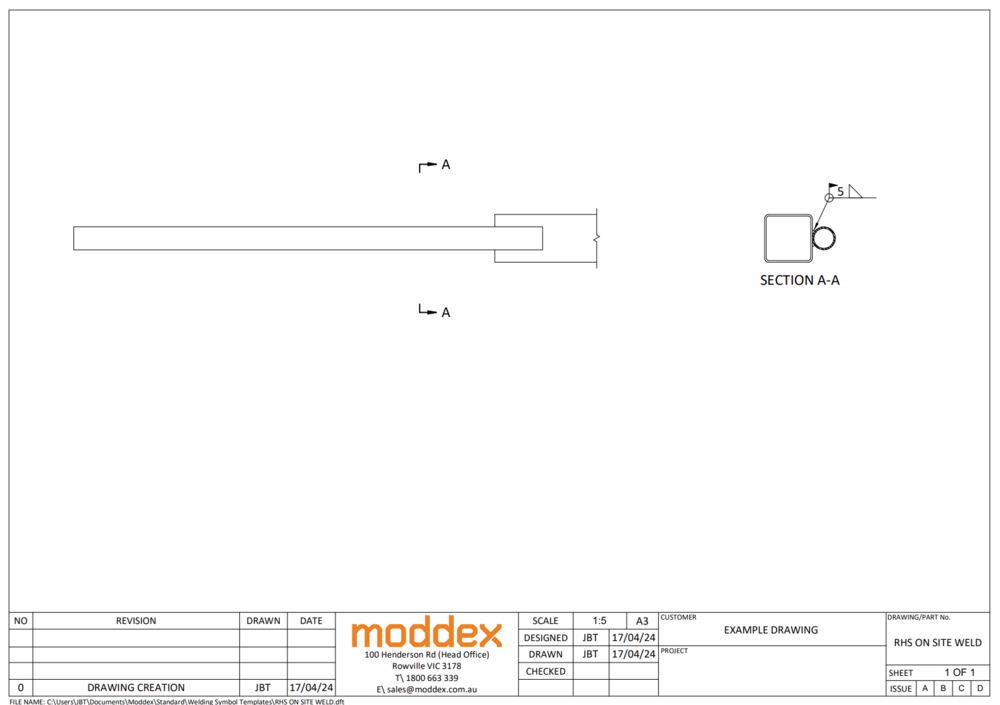
On Site Weld (ID)
The symbol shown on the drawing below (5mm fillet weld all-round) represents a requirement to site weld, rather than weld in house. This particular symbol would only appear in our installation drawings (ID).
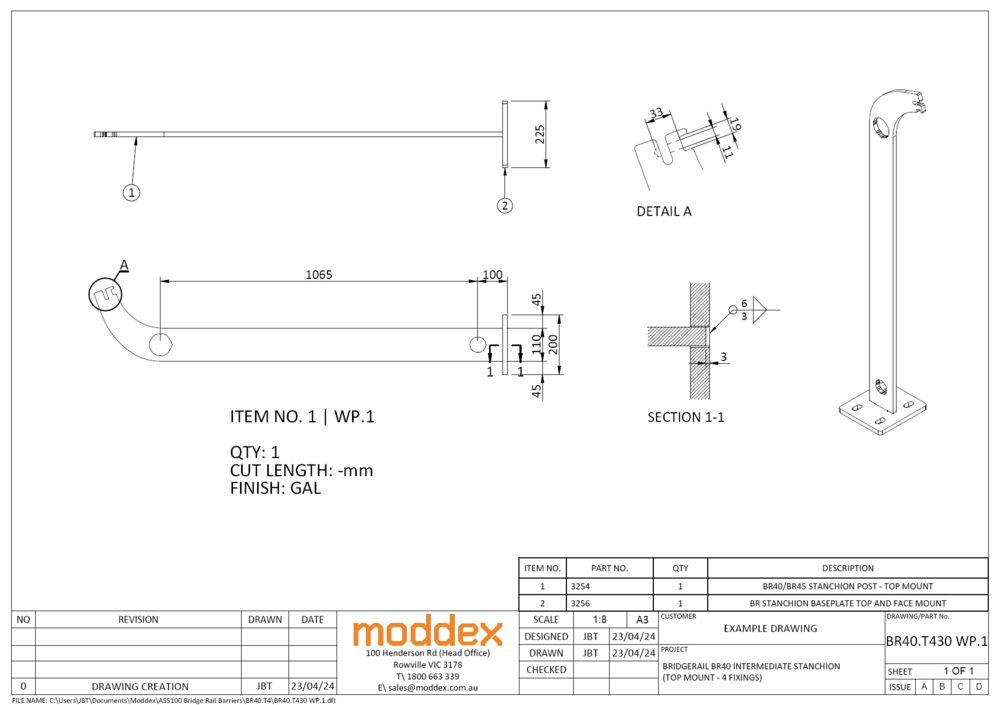
BridgeRail Welded Post
With our BridgeRail posts a larger weld is required due to the plate thickness & also for increased strength. The symbol below represents a 3mm & 6mm fillet weld all-round. Take note however, the location of where the arrow is pointing to on the drawing & which side of the symbol the number is on, is crucial. The arrow is pointing to the underside of the post, so this will be the first area welded. The upper number on the symbol is the first weld to be completed, so this will be a 3mm fillet weld all-round. On the opposite side of where the 3mm fillet weld is, is where the 6mm fillet welded all-round will be.
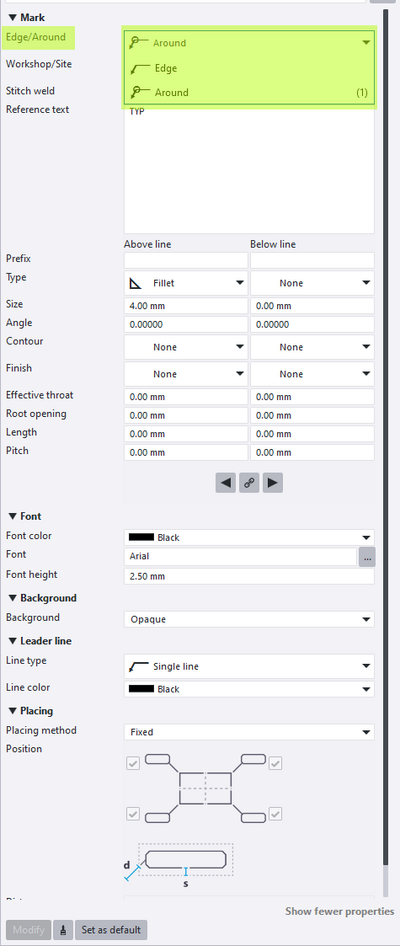
Tekla Toolbar
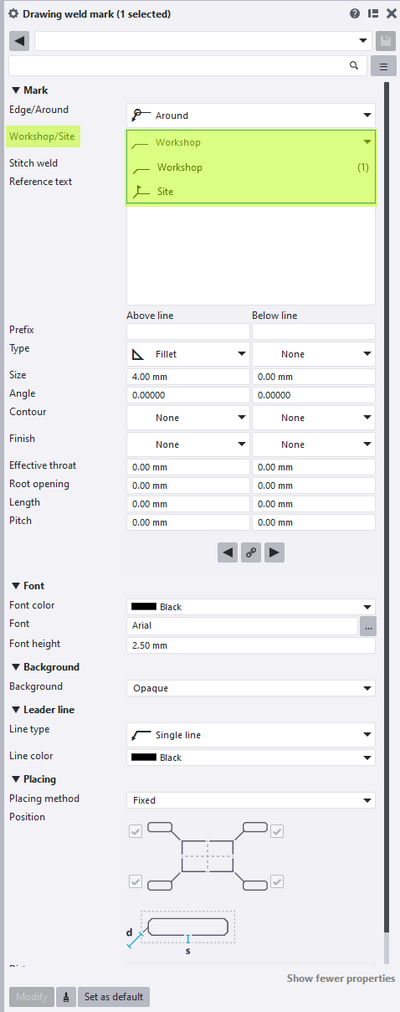
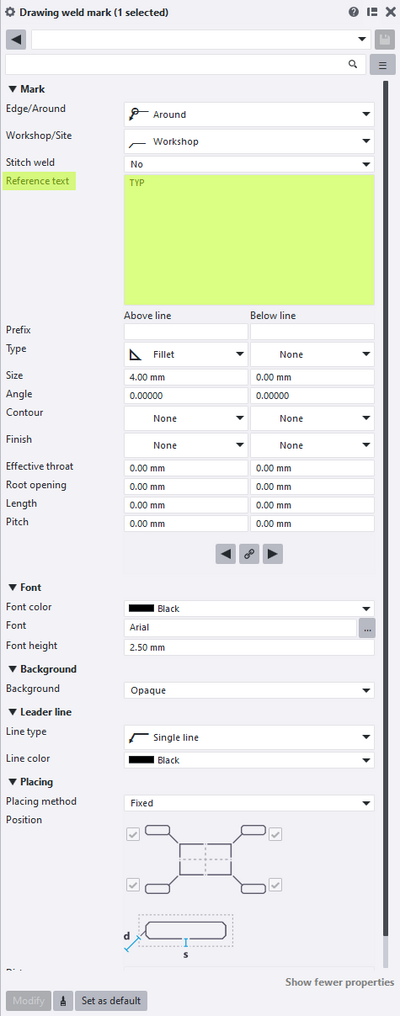
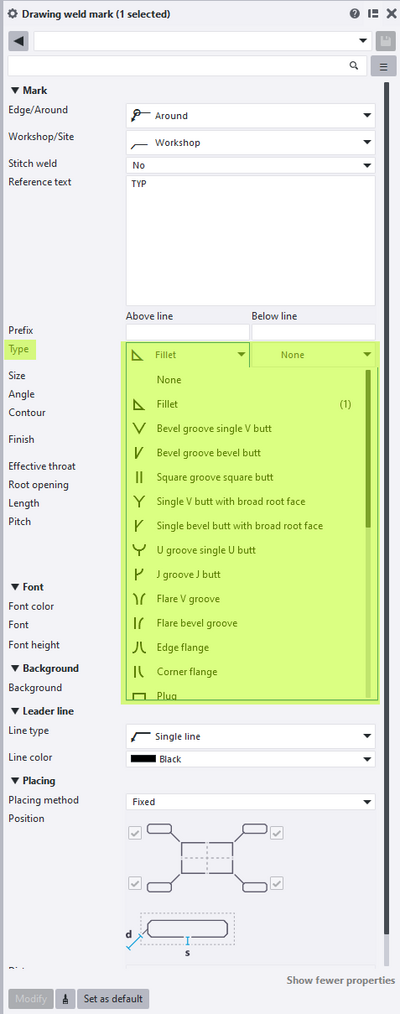
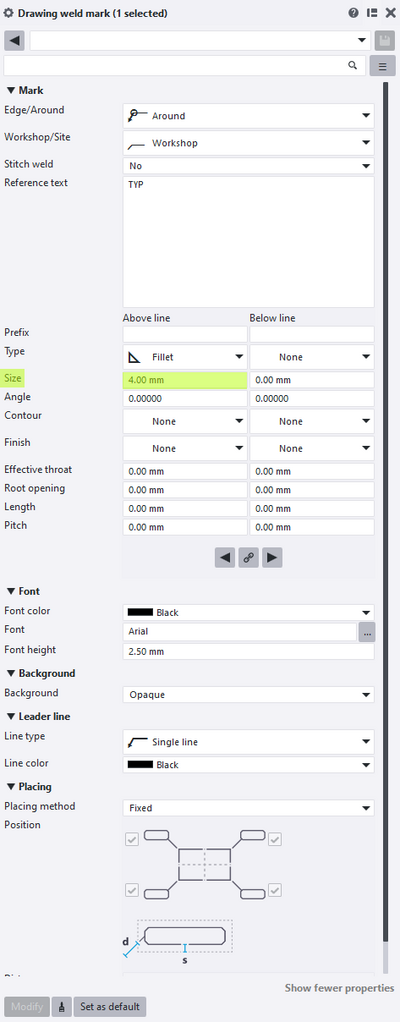
Below images show the process of adding in weld marks to drawings within Tekla. Included are the properties that will need to be adjusted as well to suit the weld you require, standard weld marks will be created in time.

