How to Import Reference Models the Right Way: Difference between revisions
GavinWootton (talk | contribs) No edit summary |
GavinWootton (talk | contribs) No edit summary |
||
| Line 6: | Line 6: | ||
- For IFC files | - For IFC files | ||
Open the IFC file with notepad and look for 'IFCCARTESIANPOINT' | Open the IFC file with notepad and look for 'IFCCARTESIANPOINT' | ||
[[File:RModel1.PNG|frameless|500px]] | |||
These will be your coordinates | These will be your coordinates | ||
| Line 12: | Line 14: | ||
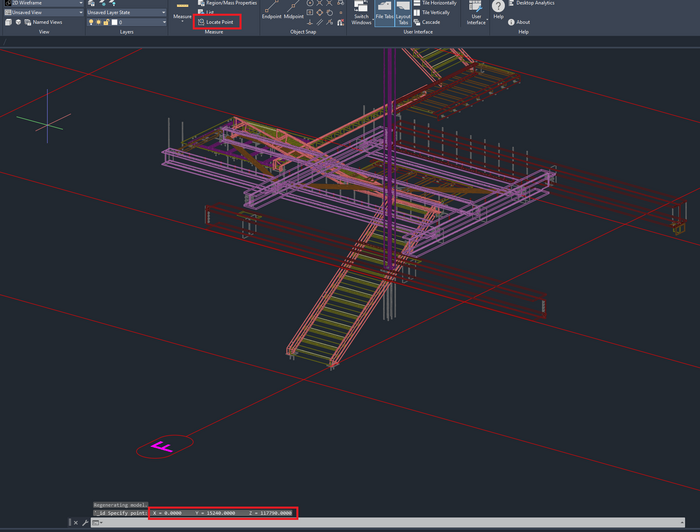
Open the DWG file with Autodesk TrueView and look for the Locate Point button | Open the DWG file with Autodesk TrueView and look for the Locate Point button | ||
Select a location close to your model and it will provide coordinates in the console | Select a location close to your model and it will provide coordinates in the console | ||
[[File:RModel2.PNG|frameless|700px]] | |||
<b>NOTE: If your coordinates are or close to 0,0,0 you wont need to continue</b> | <b>NOTE: If your coordinates are or close to 0,0,0 you wont need to continue</b> | ||
| Line 17: | Line 21: | ||
=Step 2 - Create a new Base Point= | =Step 2 - Create a new Base Point= | ||
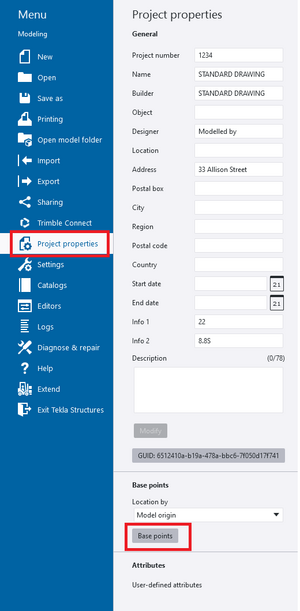
In Tekla structures, go Project properties > Base points | In Tekla structures, go Project properties > Base points | ||
[[File:RModel3.PNG|frameless|300px]]] | |||
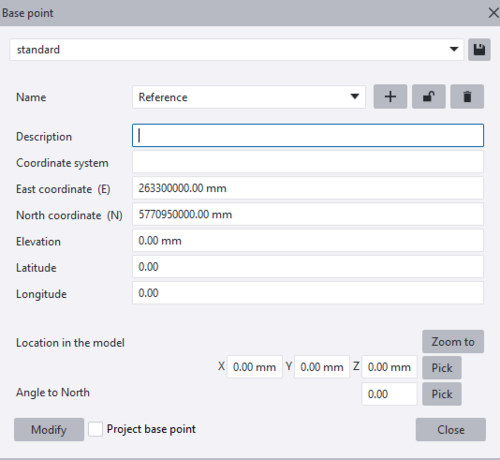
Import your coordinates from earlier and give your point a name | Import your coordinates from earlier and give your point a name | ||
[[File:RModel4.PNG|frameless|500px]]] | |||
=Step 3 - Import= | =Step 3 - Import= | ||
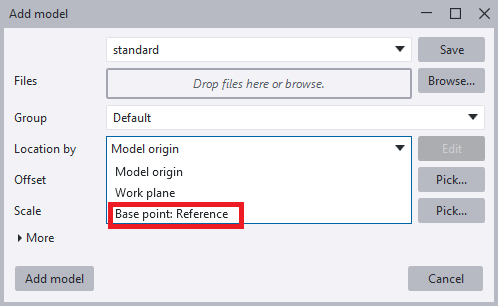
When Importing your reference model, use the newly created base point as your 'Location By:' | When Importing your reference model, use the newly created base point as your 'Location By:' | ||
[[File:RModel5.PNG|frameless|500px]]] | |||
Revision as of 22:00, 20 June 2024
When importing models from programs outside of Tekla Structures you will more often than not find them far outside the regular boundaries. First instinct is to move the reference model into your working space, however, this creates issues later down the track when exporting your handrails in a 3D format to send to customers.
This guide will show you how to import reference models into your working space while also allowing you to export to the customer with everything lined up.
Step 1 - Find the Coordinates
- For IFC files Open the IFC file with notepad and look for 'IFCCARTESIANPOINT'
These will be your coordinates
-For DWG files Open the DWG file with Autodesk TrueView and look for the Locate Point button Select a location close to your model and it will provide coordinates in the console
NOTE: If your coordinates are or close to 0,0,0 you wont need to continue
Step 2 - Create a new Base Point
In Tekla structures, go Project properties > Base points
Import your coordinates from earlier and give your point a name
Step 3 - Import
When Importing your reference model, use the newly created base point as your 'Location By:'


