How to Modify Tekla Ribbon: Difference between revisions
GavinWootton (talk | contribs) No edit summary |
GavinWootton (talk | contribs) No edit summary |
||
| Line 1: | Line 1: | ||
<b> Step 1. </b> | <b> Step 1. </b> | ||
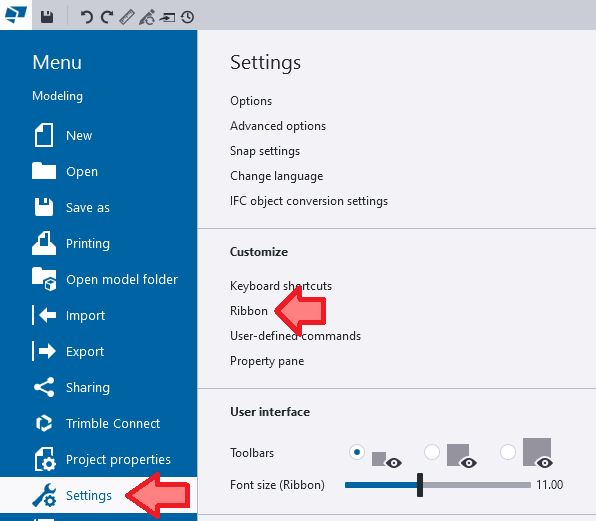
On Tekla Structures, select the hamburger menu [[File:Ribbonguide1.PNG|frameless|100px]] then | On Tekla Structures, select the hamburger menu [[File:Ribbonguide1.PNG|frameless|100px]] then Settings > Ribbon. | ||
[[File:Ribbonguide2.PNG|frameless|700px]] | [[File:Ribbonguide2.PNG|frameless|700px]] | ||
| Line 11: | Line 11: | ||
[[File:Ribbonguide3.png|frameless|700px]] | [[File:Ribbonguide3.png|frameless|700px]] | ||
<b> Step 3. </b> | |||
Drag the item where you would like it on your ribbon. | |||
Latest revision as of 02:23, 22 April 2024
Step 1.
On Tekla Structures, select the hamburger menu then Settings > Ribbon.
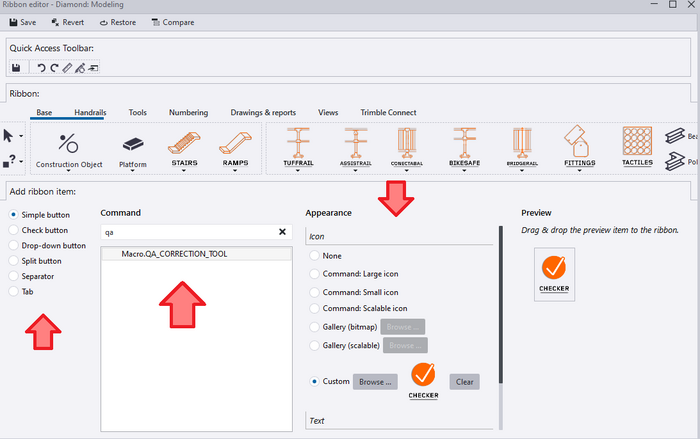
Step 2.
Select a ribbon item, this can be a button, dropdown, separator etc...
If you are making a button, select a command and icon, a list of these can be found on Our Plugins
Step 3. Drag the item where you would like it on your ribbon.


